One first session, start to finish: signing in, starting a campaign, building a survivor, playing a scene and
fighting a short battle on the map. Every picture below is the real game, taken during a real session.
This whole session was played with no AI key. The rules engine rolled every check and every shot.
An AI game master is optional — it adds narration and understands anything you type — and it runs on your own key
(section 2).
1Getting in
Apocalypse is a private campaign server. Your email address has to be on the invite list first — ask whoever runs
this server to add it. Once it is, you can sign in any time; there is no password to make or remember.
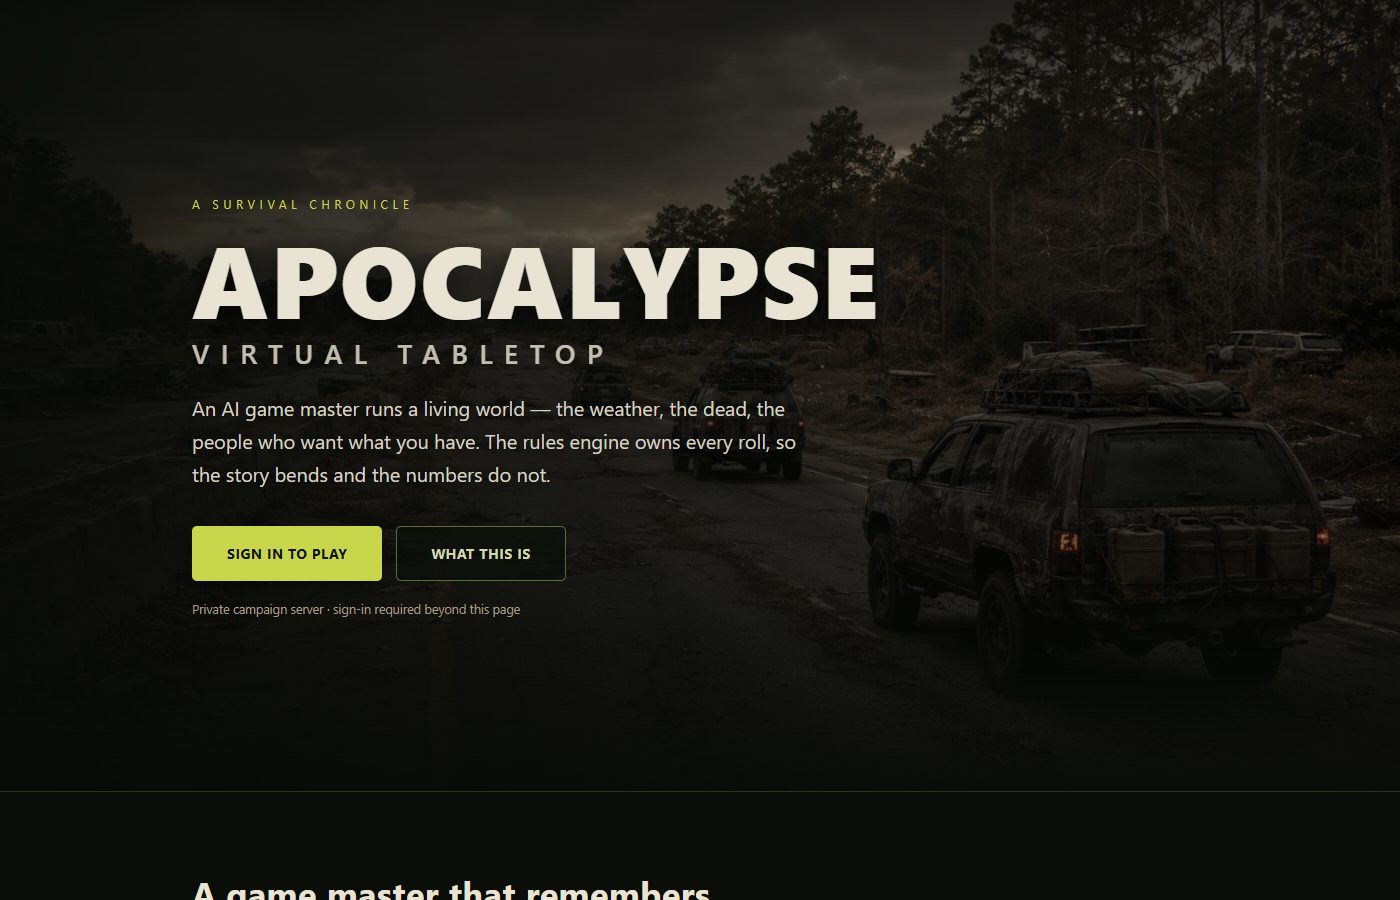
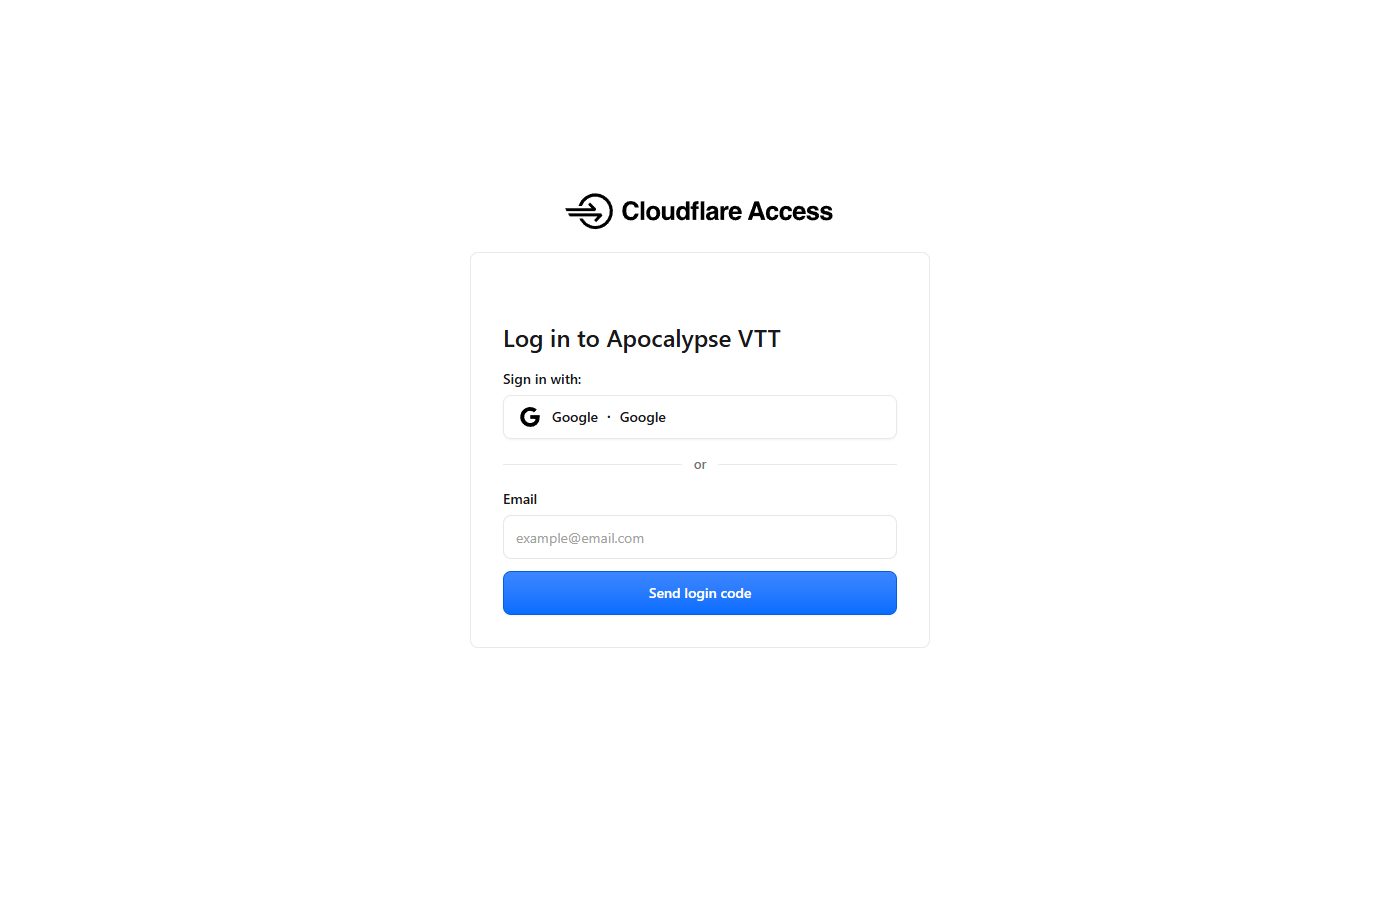
The front page. Press Sign in to play.The sign-in page. Either press Google (if your invited address is a Google account), or type your
email and press Send login code, then type the code from your inbox. That's your account: the code proves the
address is yours.
2Your AI keys (optional)
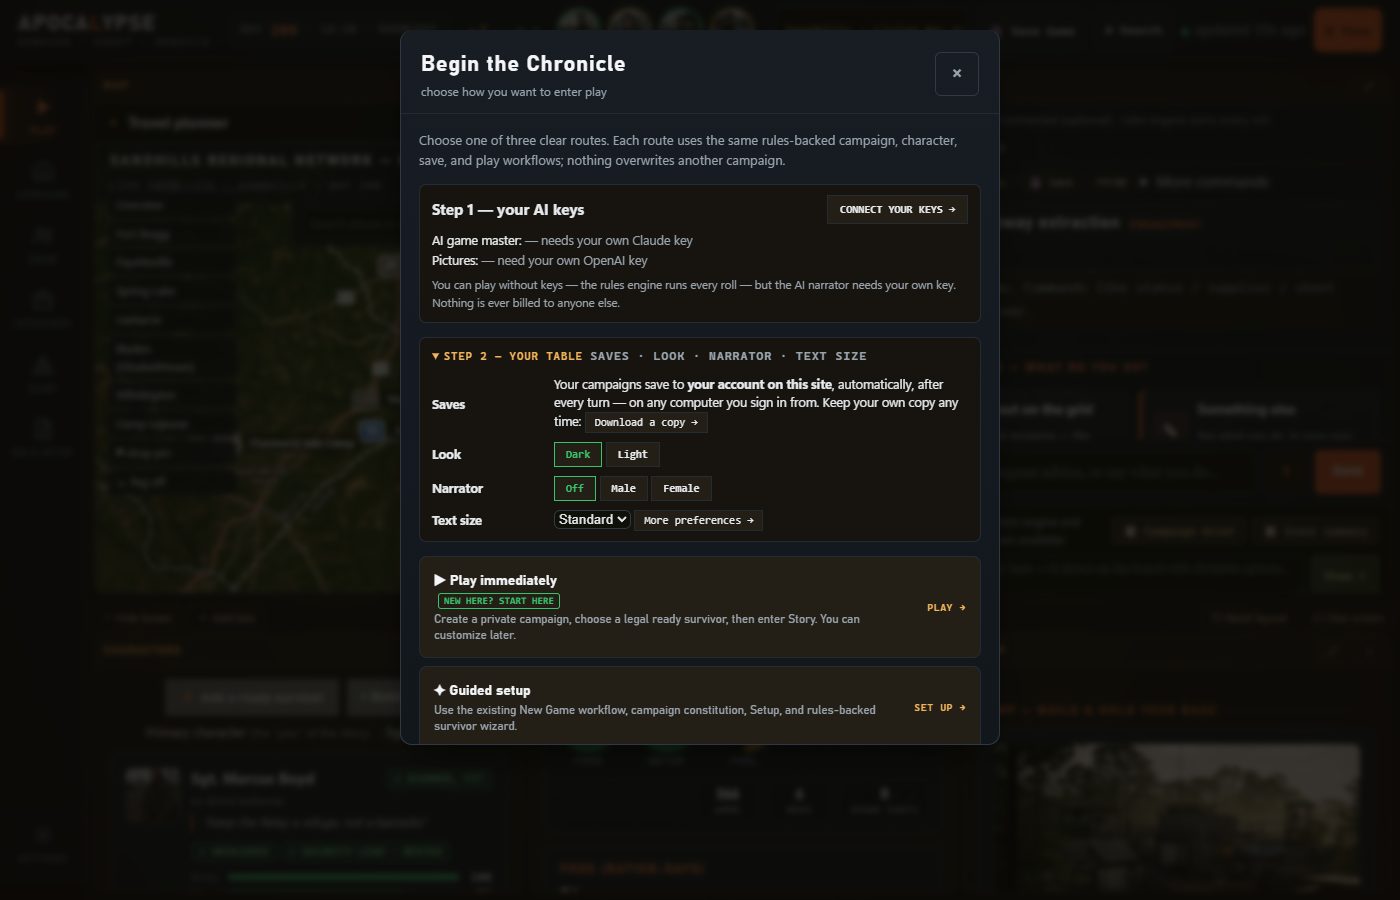
The first time in, the game asks how you want to begin. At the top is Step 1 — your AI keys.
The first screen after signing in. You can skip the keys and play; the rules engine runs every roll
either way. Under the keys, Step 2 — your table: where your games are saved (your account on this site,
automatically, with a button to download your own copy), Dark or Light, the narrator (Off, Male or
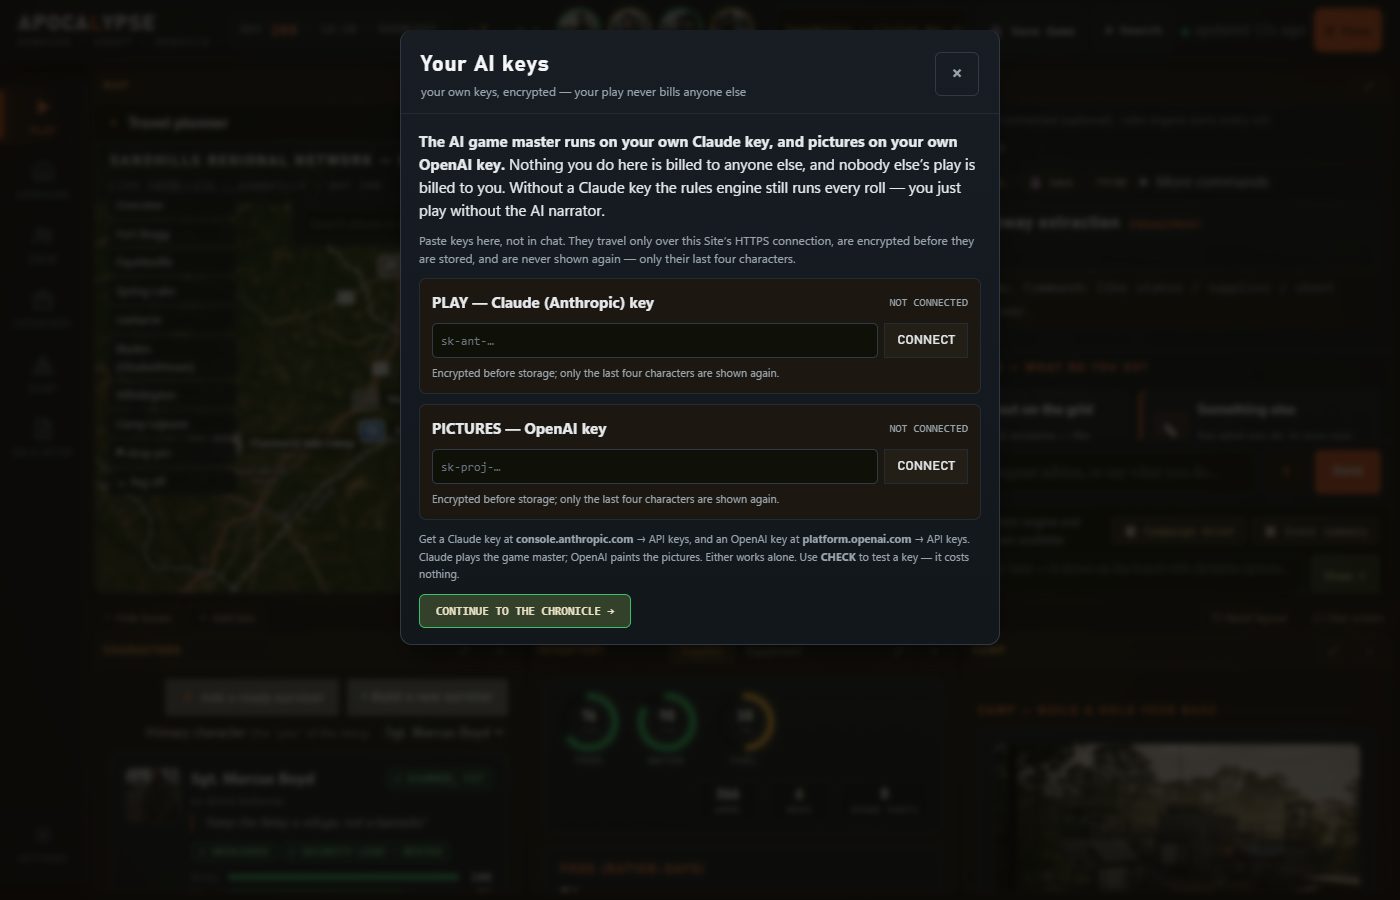
Female, the voice, and a ▶ Sample to hear it first) and the text size. All of it can be changed later.Connect your keys opens this. A Claude key (from Anthropic) runs the AI game master; an OpenAI key
makes scene pictures. Each is billed to your own account, never to anyone else's — and nobody else's play is
billed to you. Keys are encrypted before they are stored and never shown again, only their last four characters.
Paste a key here, never into the story chat.
3Start a campaign
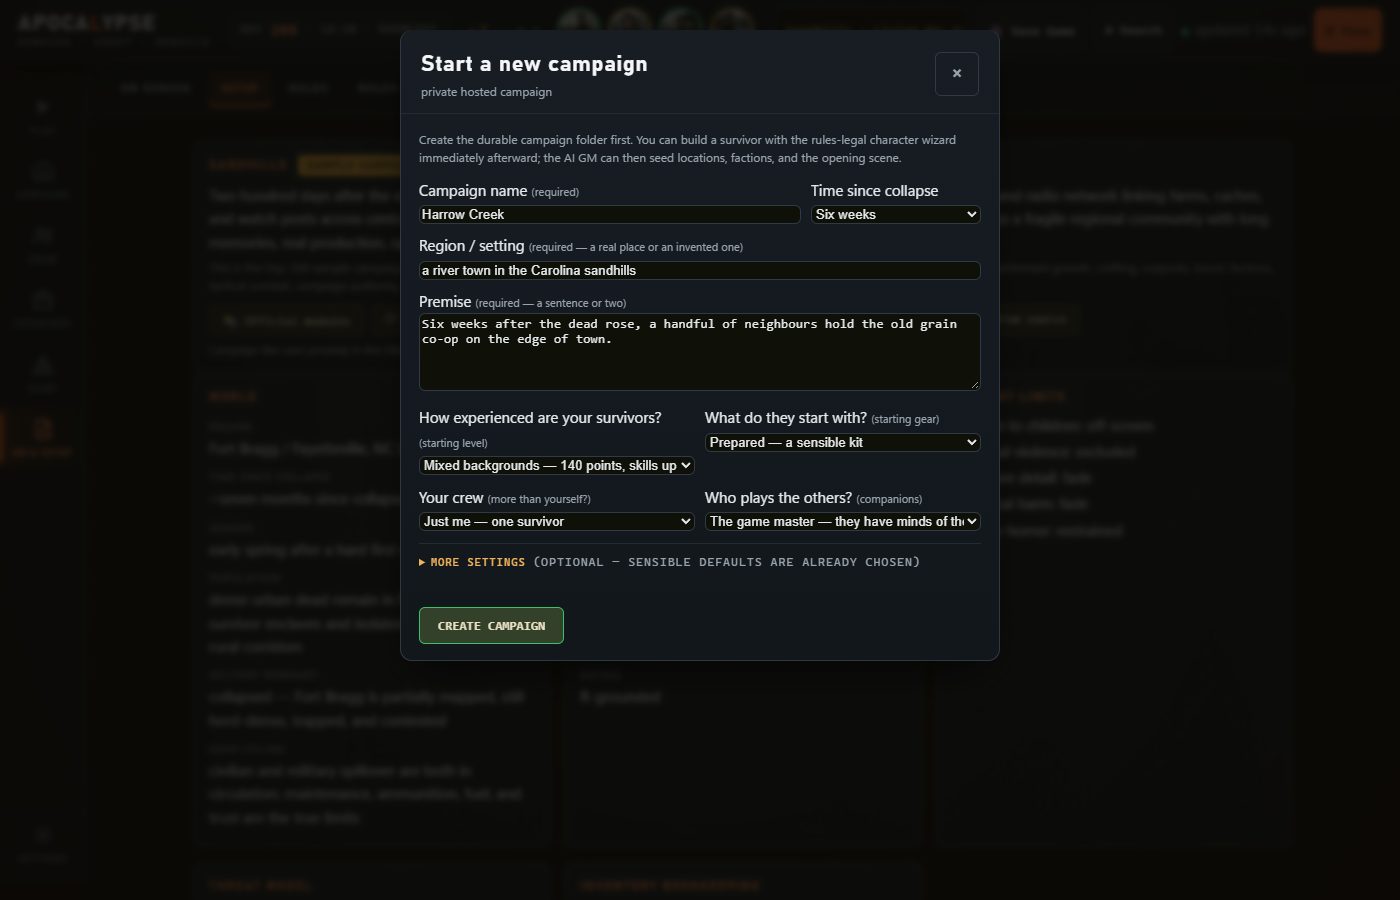
A campaign is your world: where it is, how long since the collapse, and what your group is holding onto. On the
first screen pick Guided setup (or Play immediately if you want a ready-made survivor instead of
building one).
Three things are required: a name, a region (a real place or an invented one) and a
premise in a sentence or two. Then four choices, each with a sensible default:
how experienced your survivors are (Ordinary, Mixed or Trained — more points to spend the more trained),
what they start with, your crew (just you, or a crew of several — built, picked from ready survivors, or
assigned) and who plays the others (the game master, with minds of their own, or you). Everything under
More settings has a default too. Press Create campaign; if anything is missing the field is highlighted
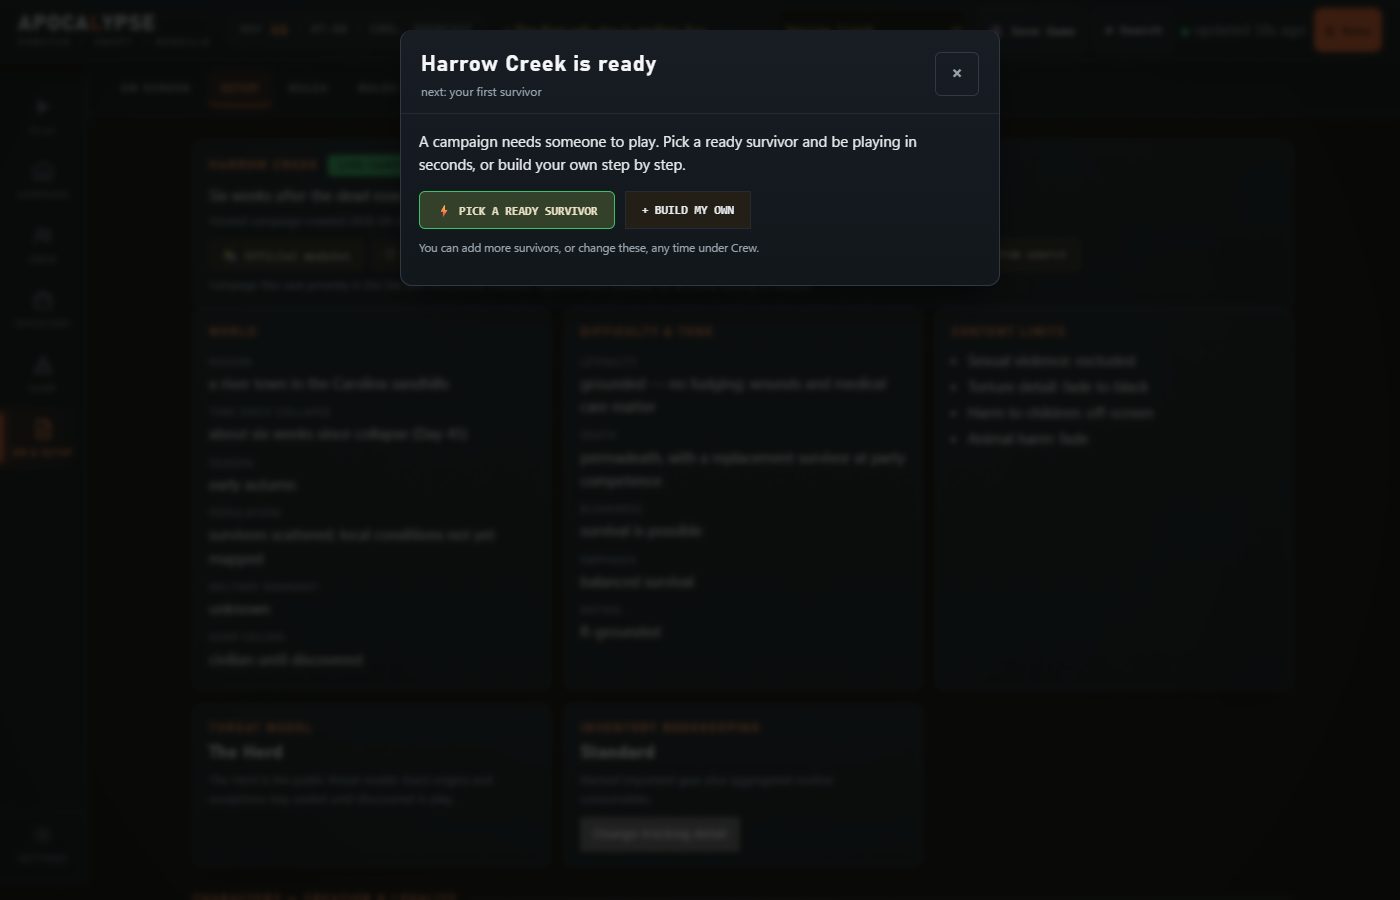
and nothing you typed is lost.The campaign exists and is saved. Next the game asks who you'll play: Pick a ready survivor to be
playing in seconds, or Build my own. This guide builds one.
4Build your survivor
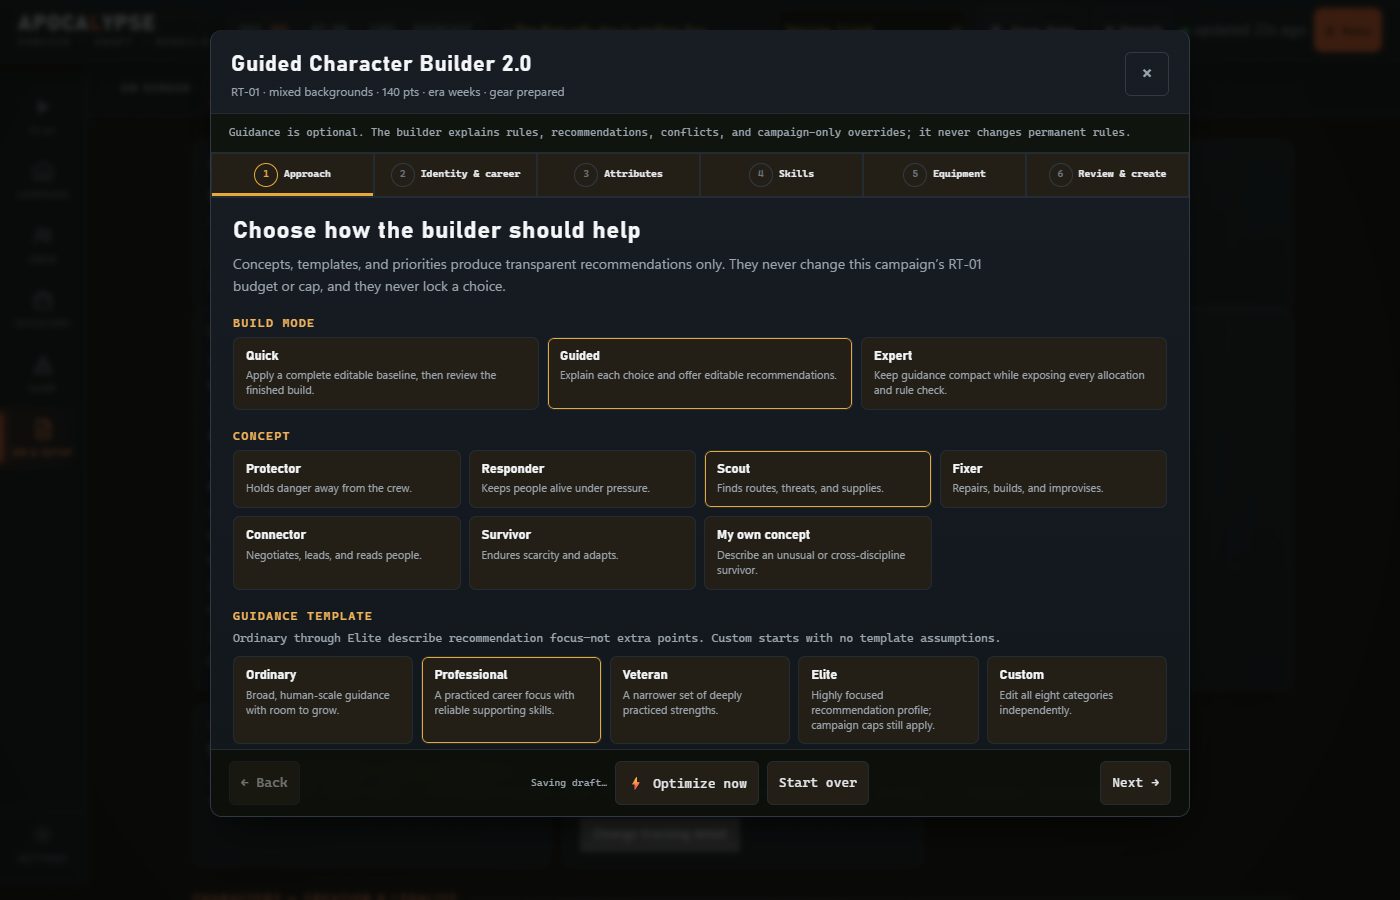
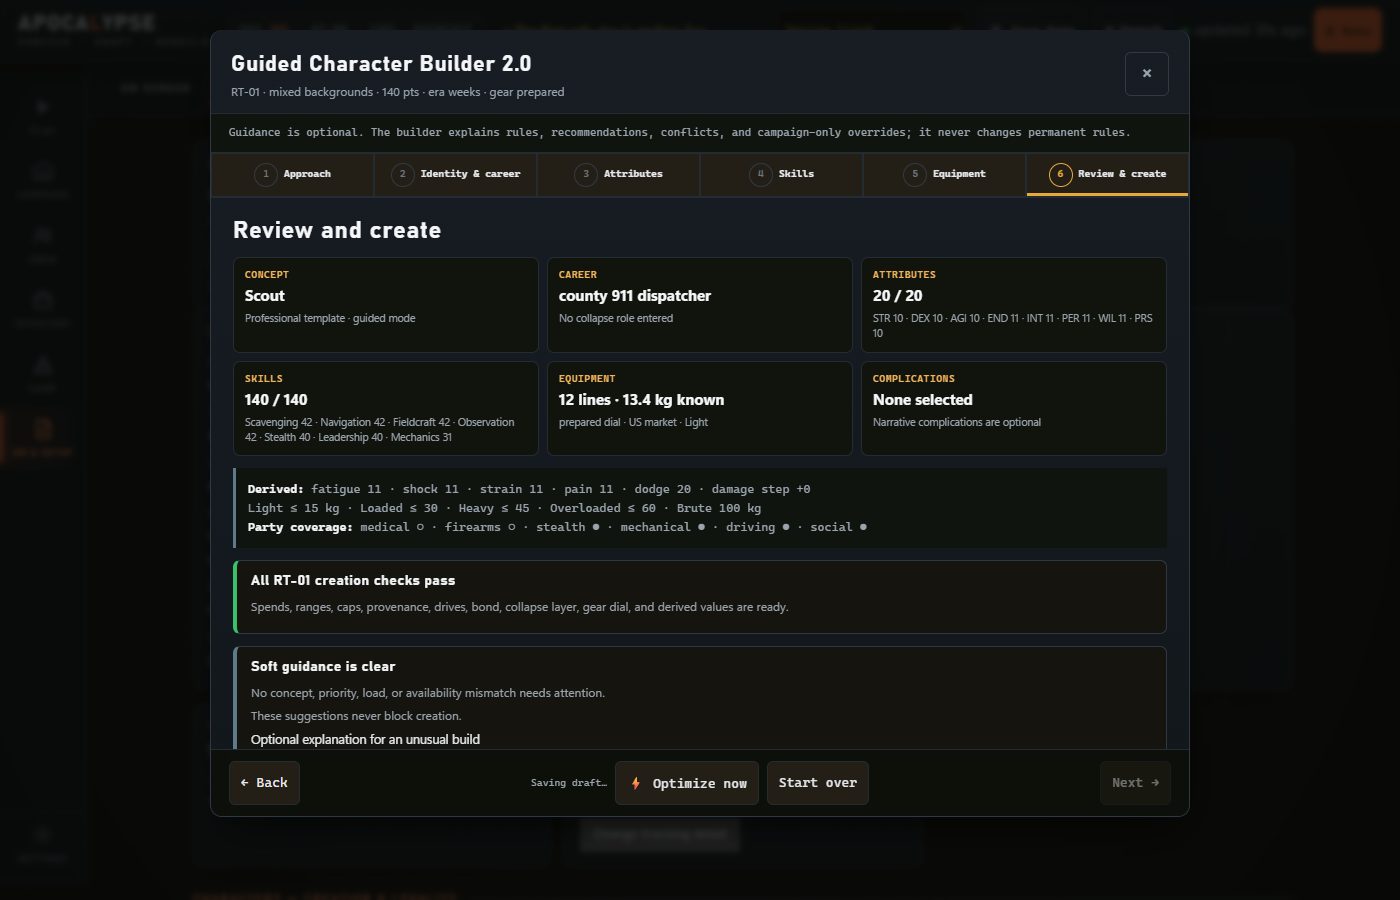
The builder has six steps across the top. You can click any step to jump to it, and your draft saves as you go.
Two helpers are on every step: ⚡ Optimize now makes every choice you haven't made yet — well, and within the
rules — and takes you straight to the review; Ask the AI for advice answers questions about this survivor
on your own Claude key.
1 · Approach. Choose how much help you want (Guided explains each choice), a
concept — here Scout — and a template. Apply attribute + skill recommendations fills in a sound
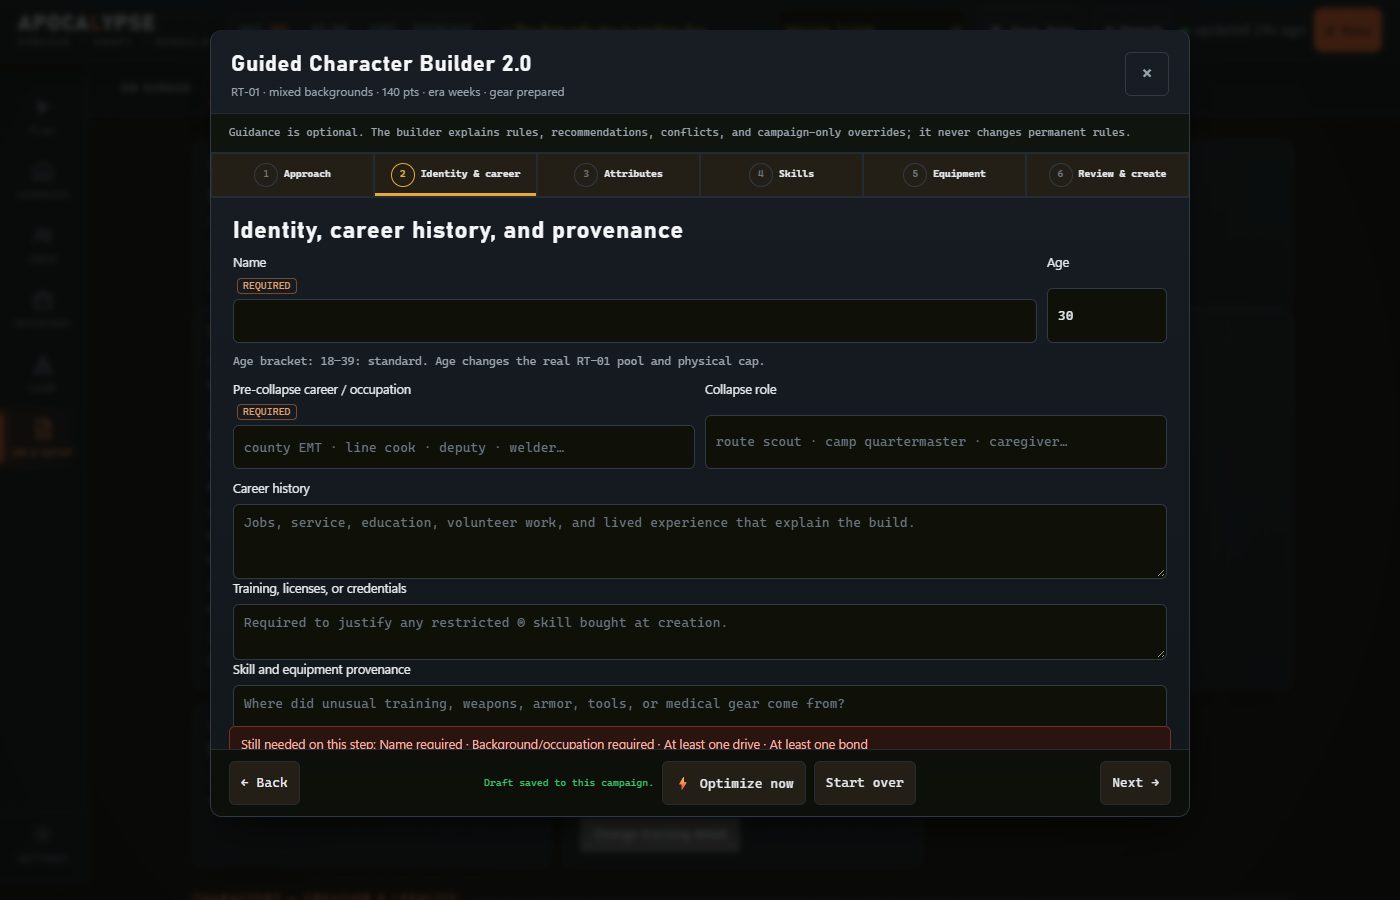
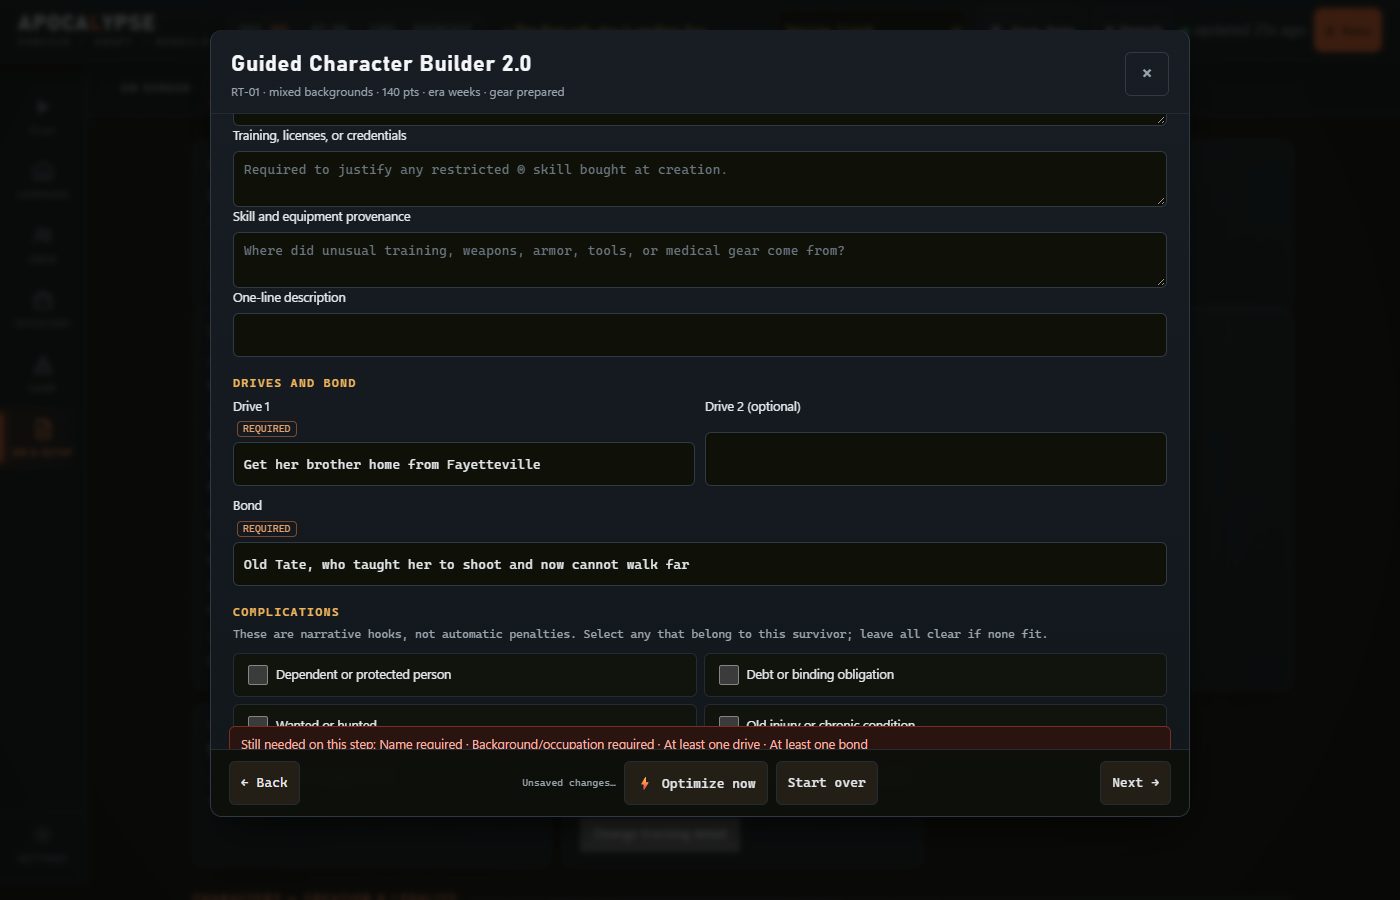
starting build you can change later.2 · Identity & career. Fields marked required have to be filled before Next will move
on — if you press it too early, the builder says exactly what is missing, right here.Name, age, career before the collapse, one drive (what keeps them moving) and one bond (a
person who matters). Career, role, drive and bond each open a list to pick from — or type your own. Here: Mara Quill,
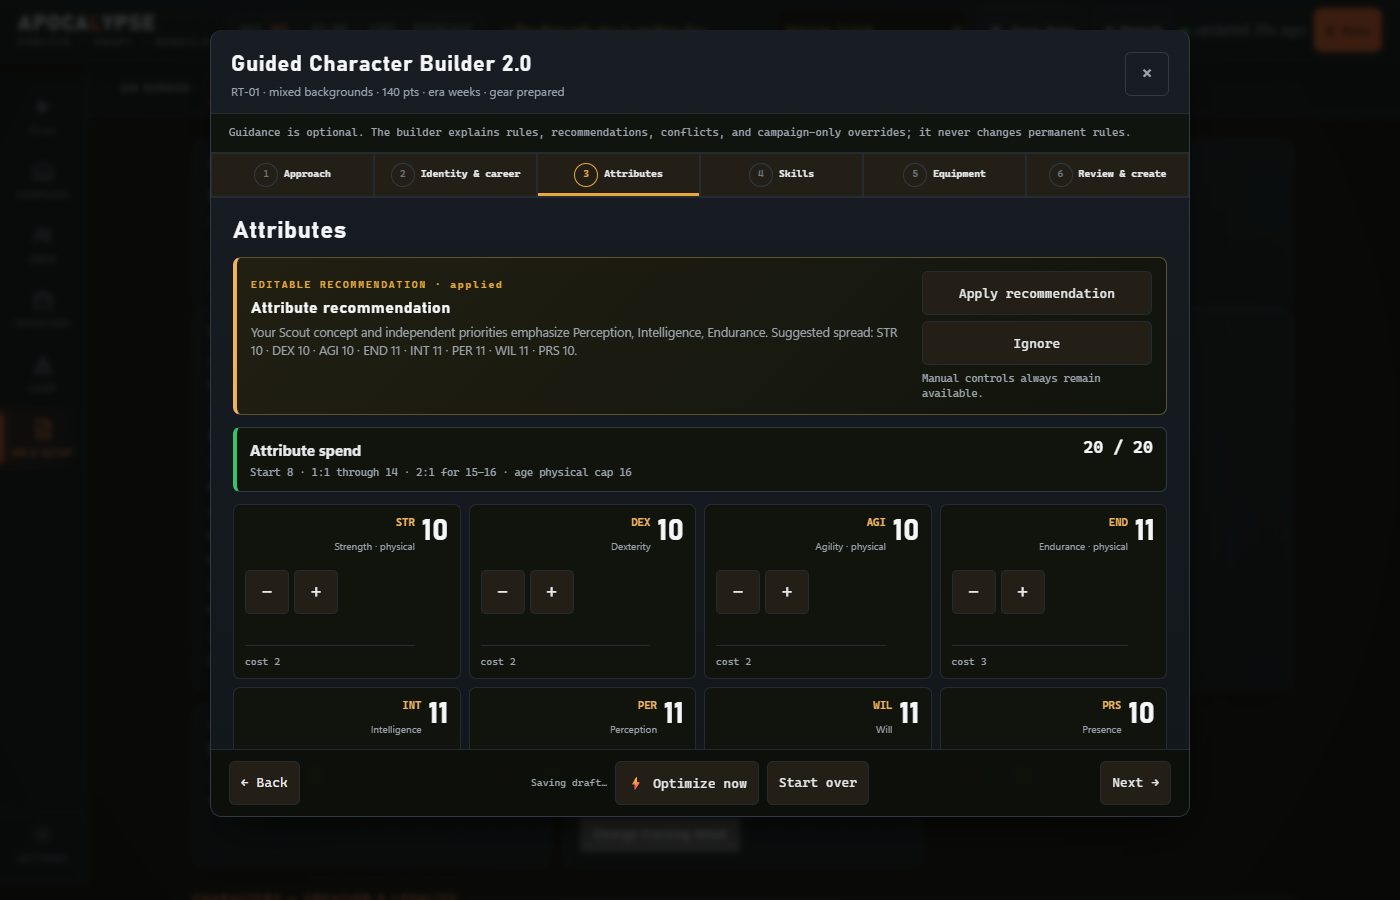
a county 911 dispatcher, trying to get her brother home.3 · Attributes. Strength, agility, perception and the rest. The recommendations are already applied;
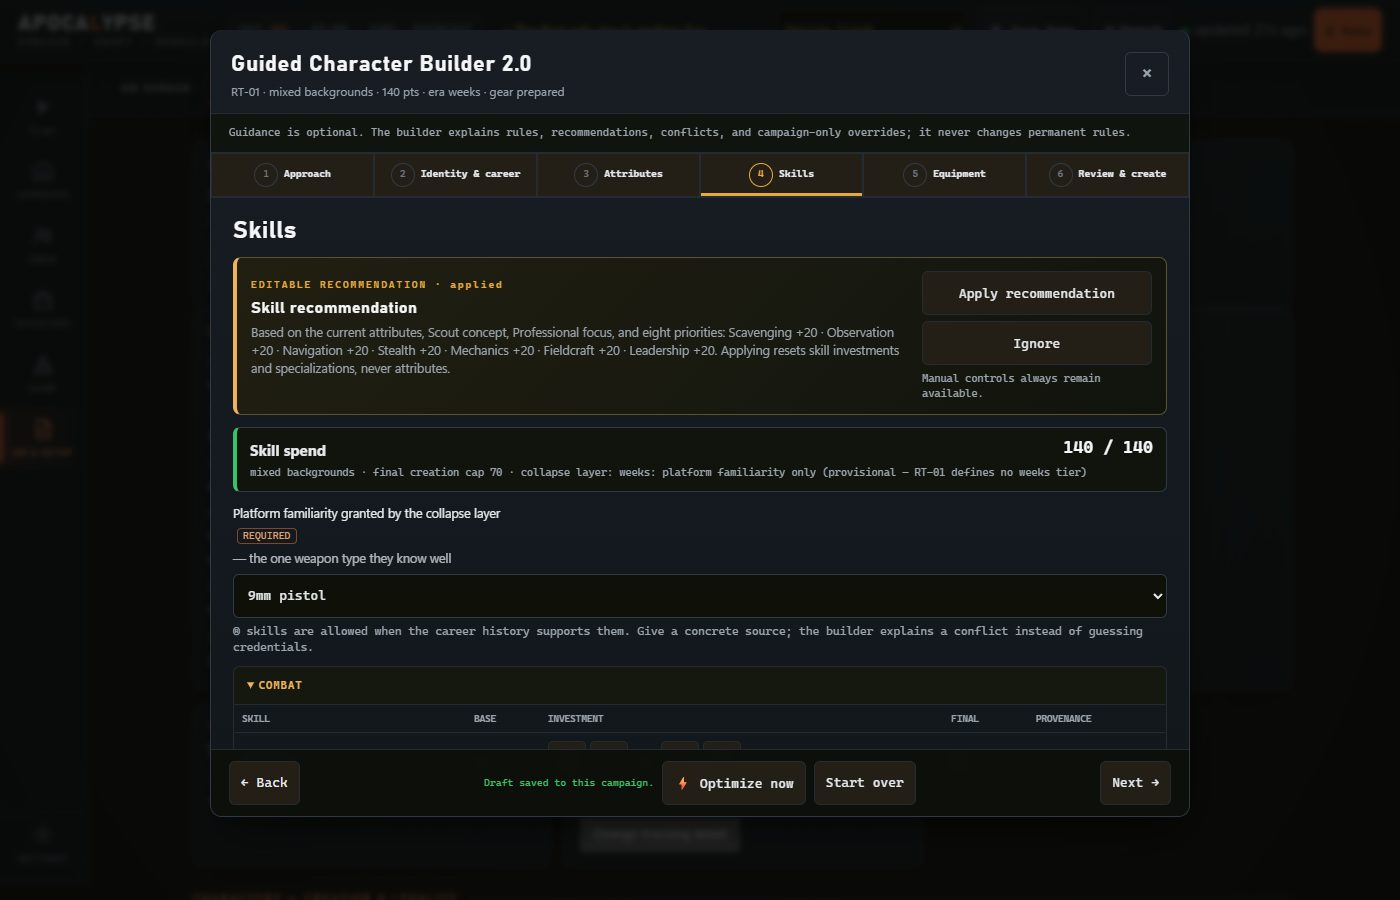
the points must add up exactly, and the builder tells you if they don't.4 · Skills. Where your points went. Some settings grant a platform familiarity — pick the one
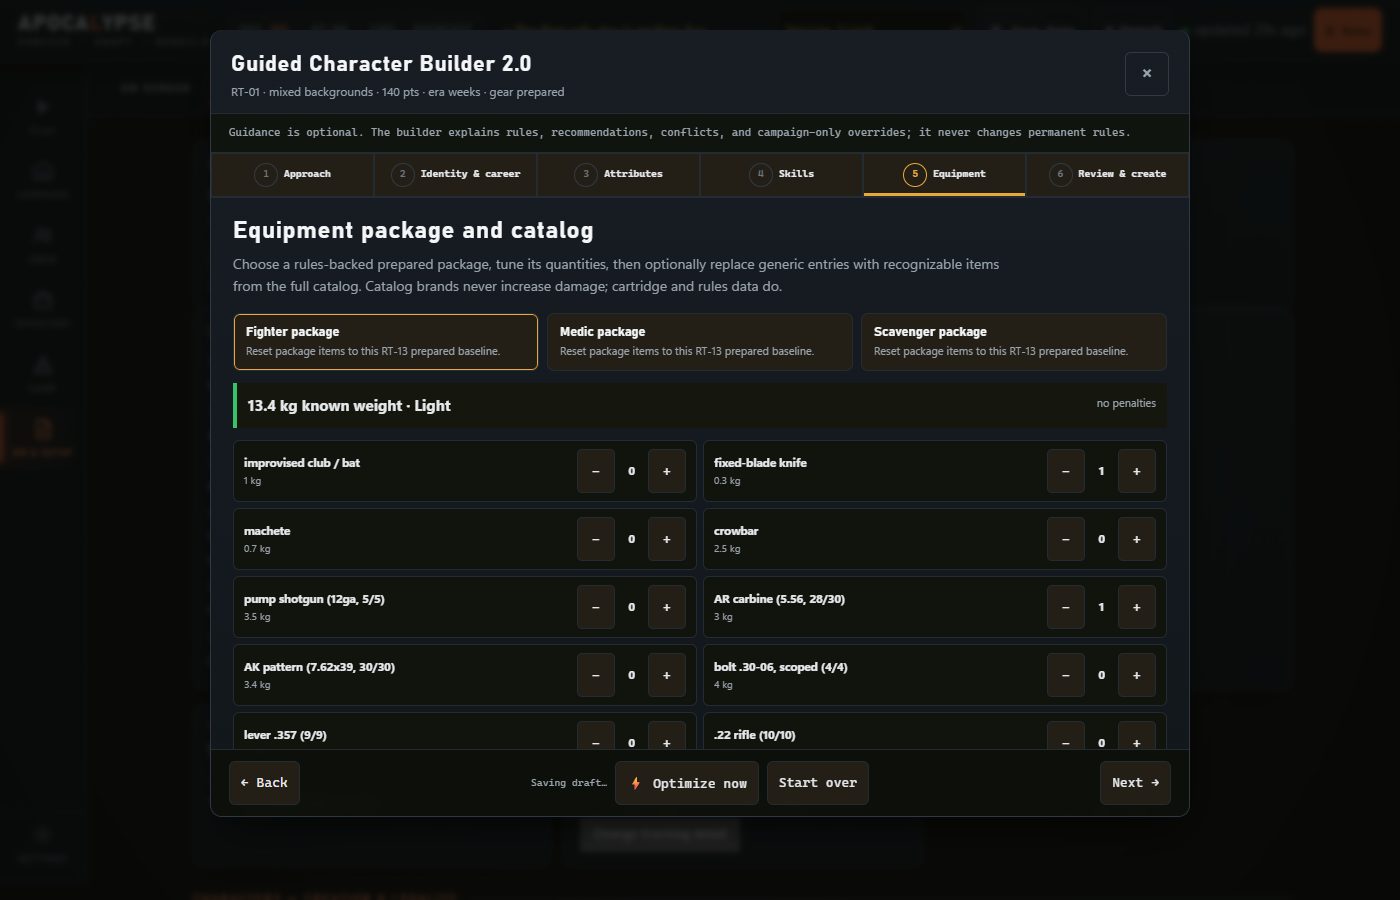
kind of weapon your survivor knows well from the list (here, 9mm pistol).5 · Equipment. Pick a package (Fighter, Medic or Scavenger) and adjust. Weight matters: the load
readout tells you how much you're carrying.6 · Review & create. Everything in one place. When All creation checks pass, press
Create. If something is still open, each item in the list takes you straight to the step that fixes it.
5Your table
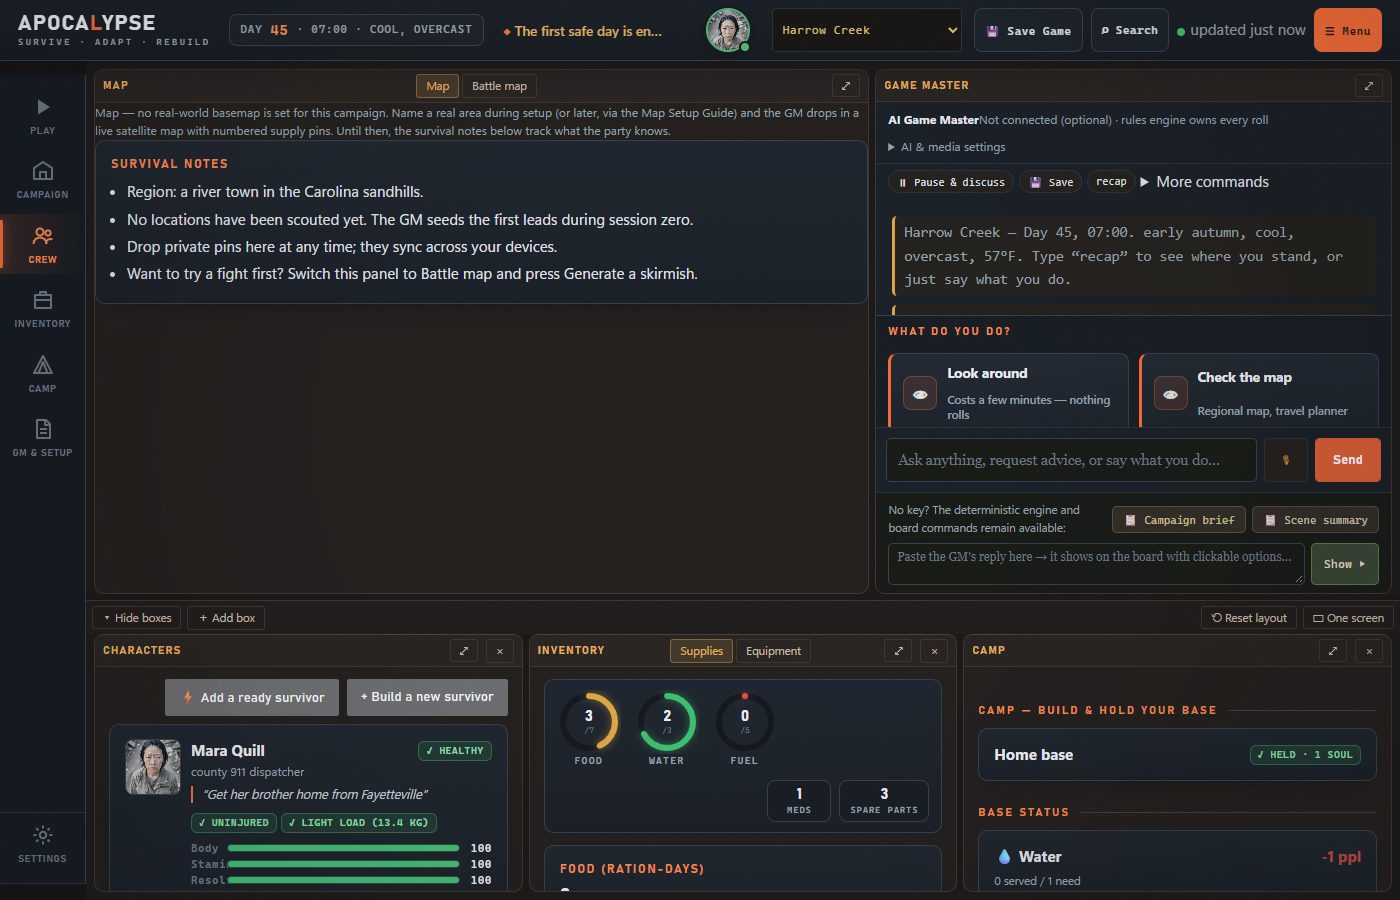
Your table. With a crew of several, Primary character at the top of Crew picks the one who is
“you” in the story. Top left: the map (and the Battle map tab). Top right: the game master —
the story, and the box where you say what you do. Below: your characters, supplies and camp. The bar at the
top shows the day, time and weather; Save Game is always there. The ⤢ on any panel makes it fill the
screen; Back to the table returns.
6Play a scene
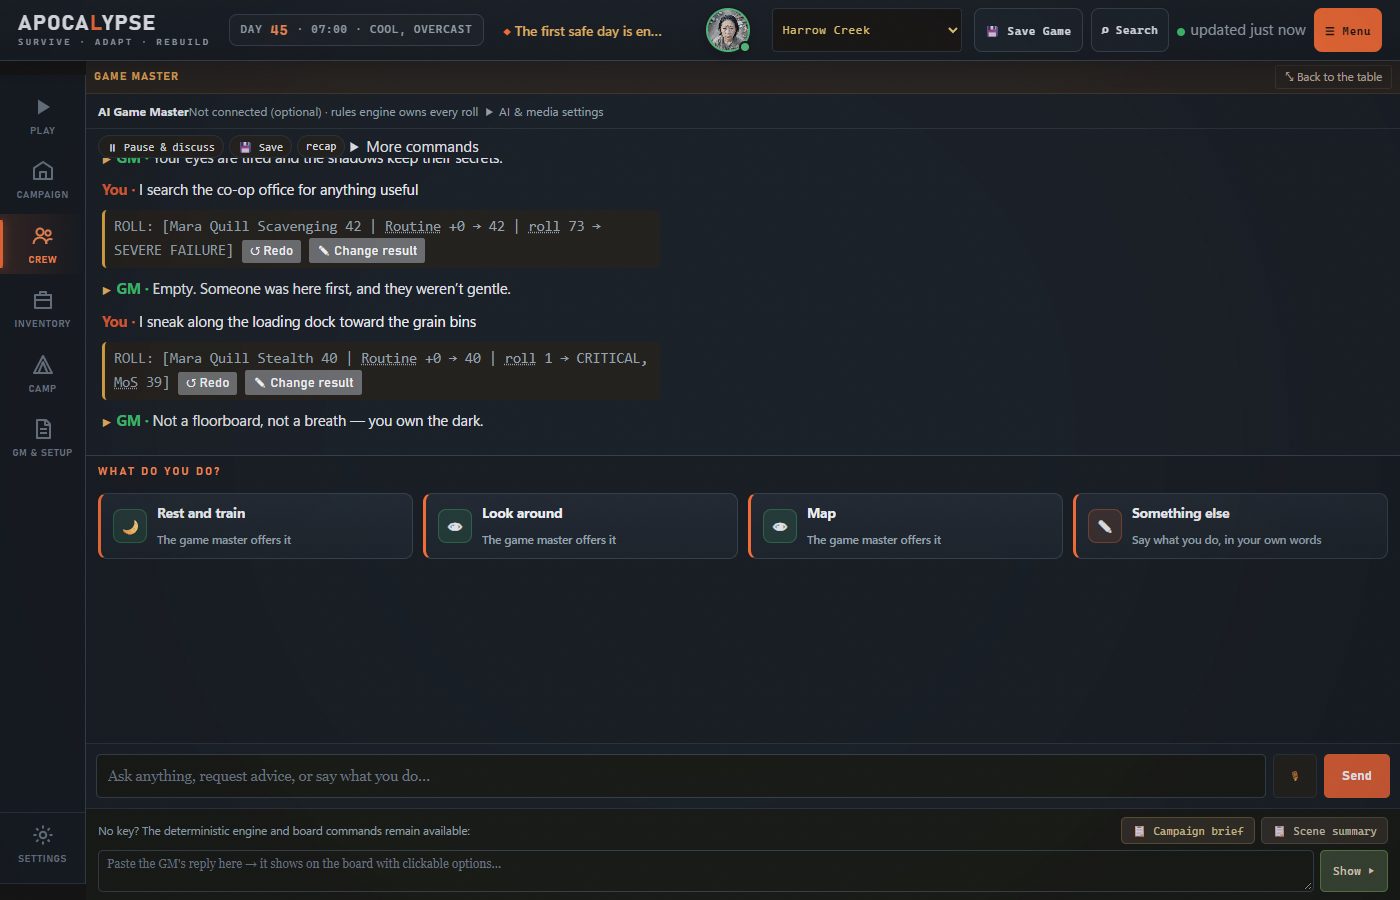
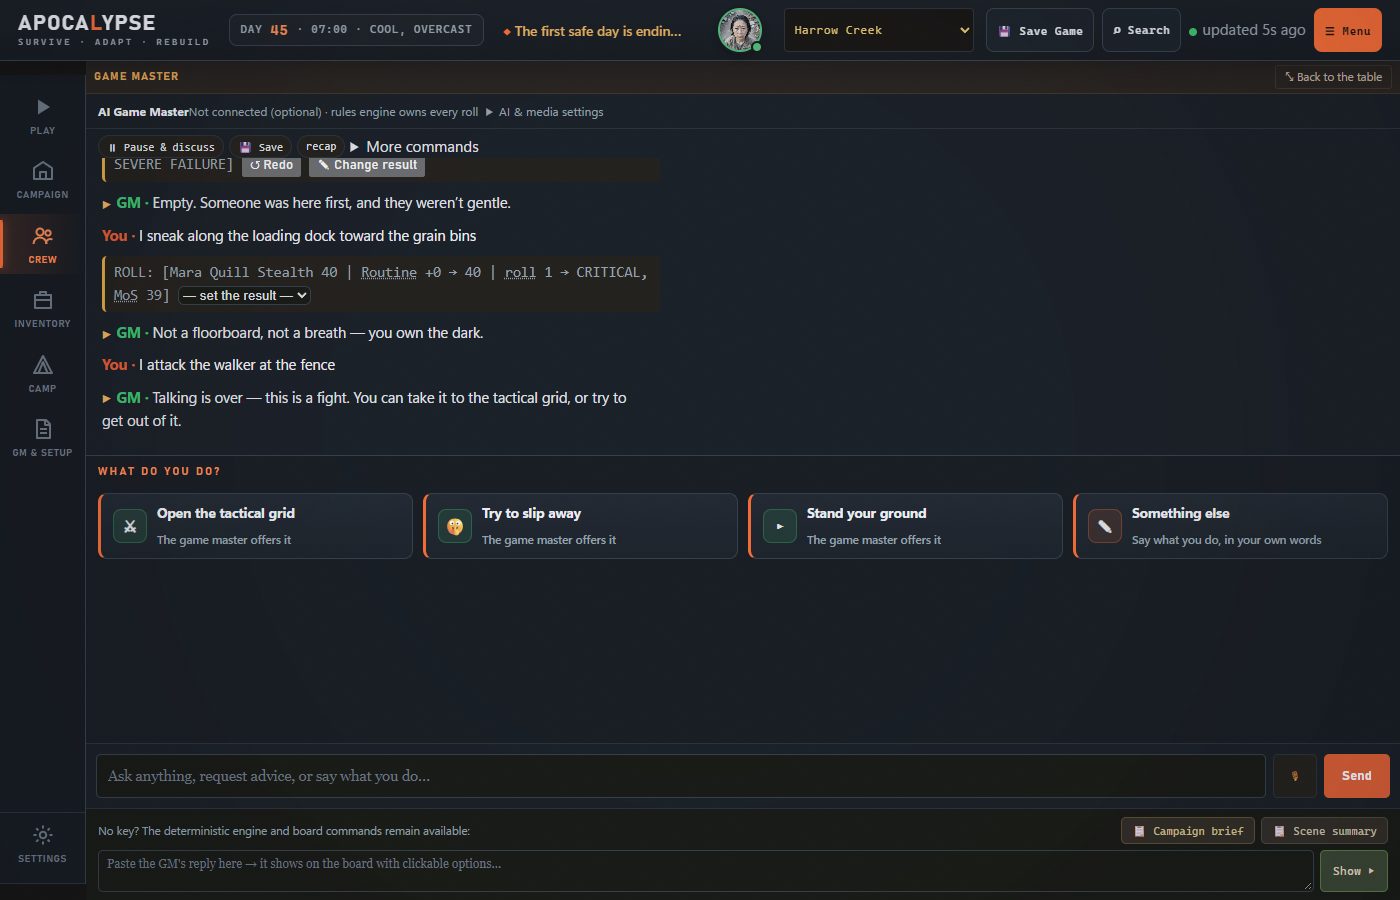
Type what your survivor does in the box and press Send — look around,
I search the co-op office for anything useful, I sneak along the loading dock. The engine
works out which skill it is, rolls it, and tells you what happened. The cards under What do you do? are
one-click suggestions.
Three actions and their rolls. Hover any dotted word in a roll line for a plain explanation. The cards
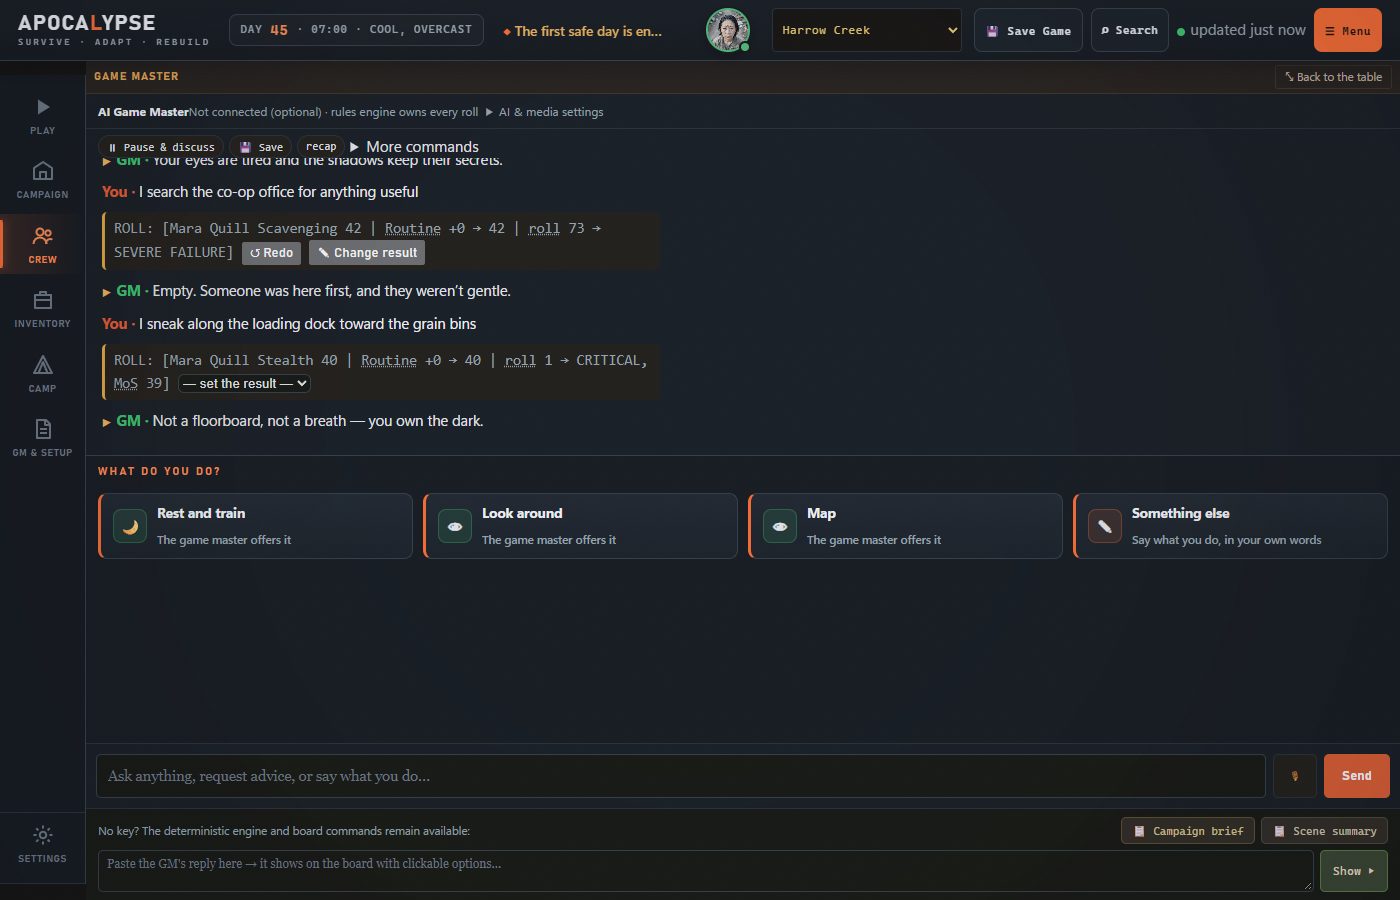
under What do you do? always end with Something else — your own words.Your call, always. Every roll line has ↺ Redo (roll it again) and ✎ Change result
(set it yourself). There is no such thing as cheating in your own game: the choice is noted in the campaign's
record and nobody comments on it.
How to read a roll line
Scavenging 42
Mara's skill: the number she has to roll at or under.
Routine +0 → 42
How hard the task is, and the final target after it.
roll 3
The dice: a d100 roll, 1 to 100. Low is good.
SUCCESS, MoS 21
The result. MoS is the margin of success — how far under the target the roll
came. Bigger is better; a very low roll is a critical, a very high one a fumble.
Without an AI key the engine understands everyday actions — look, search, sneak, climb, force, pick a lock, talk
someone down, patch up, fix, drive, track, travel. With your own Claude key the game master follows anything you
say, and still has to roll through the same engine.
7A fight on the map
When something turns violent — I attack the walker at the fence — the game offers to take it to the
tactical grid.
Choose Open the tactical grid — or try to slip away. (To try a fight at any time, switch the map
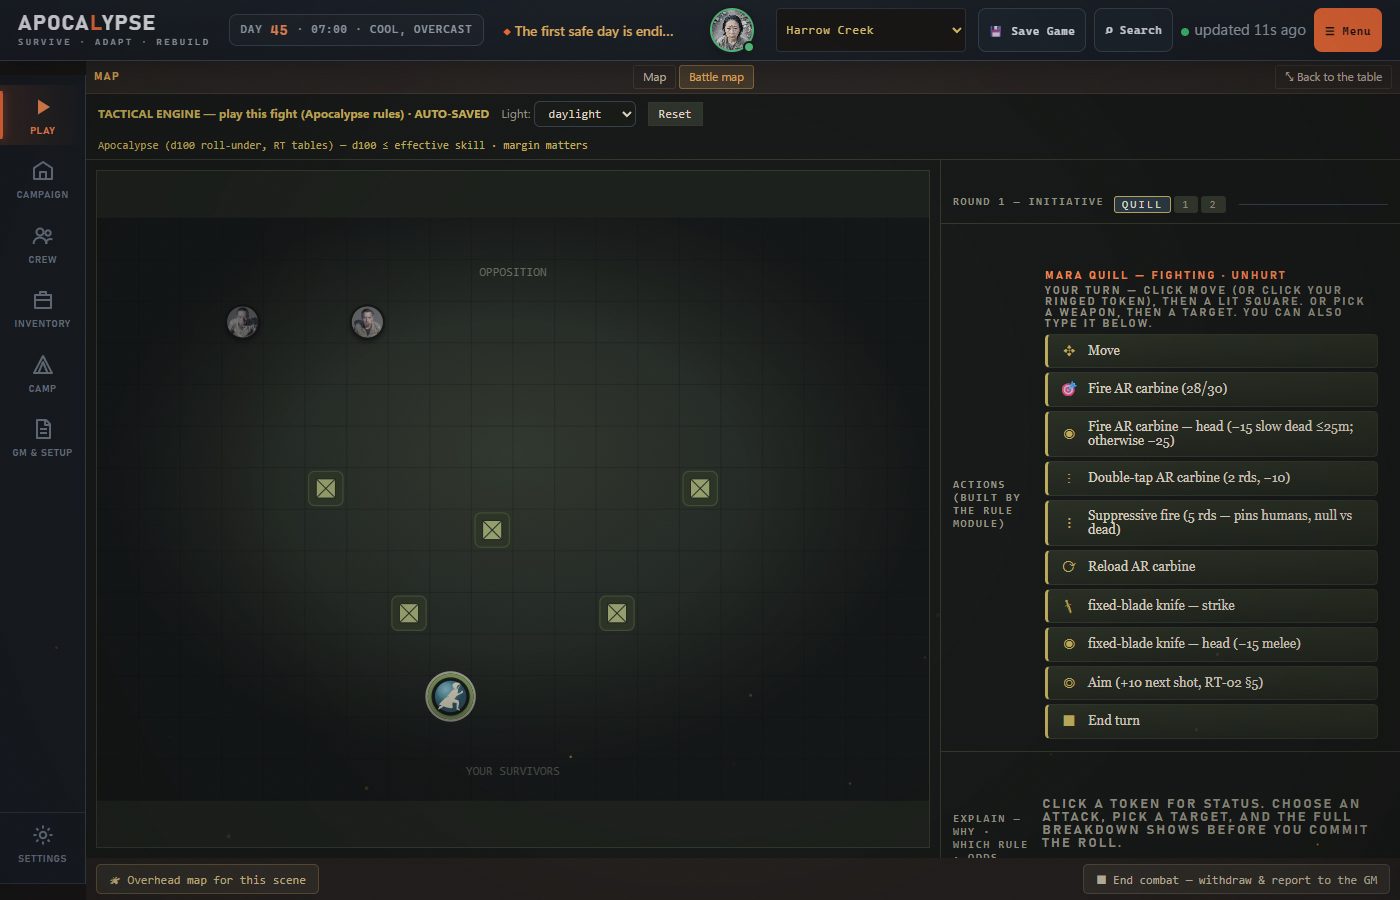
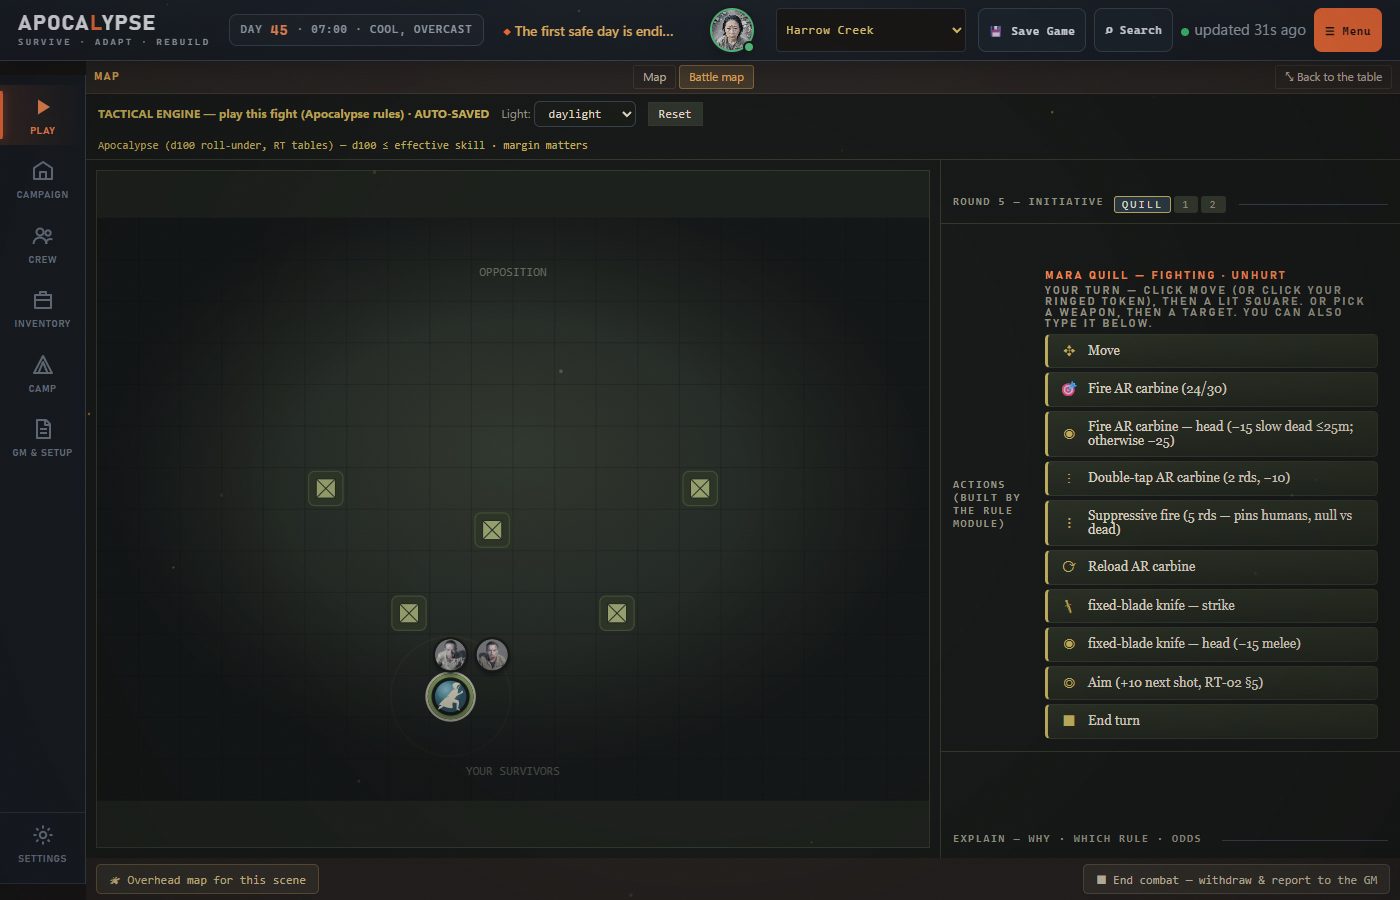
panel to Battle map and press Generate a skirmish.)The grid. Your survivors start at the bottom, the threat at the top; the crates are cover (hover a
square or a figure to see what it is). On your turn the actions on the right come from your real gear: move, fire,
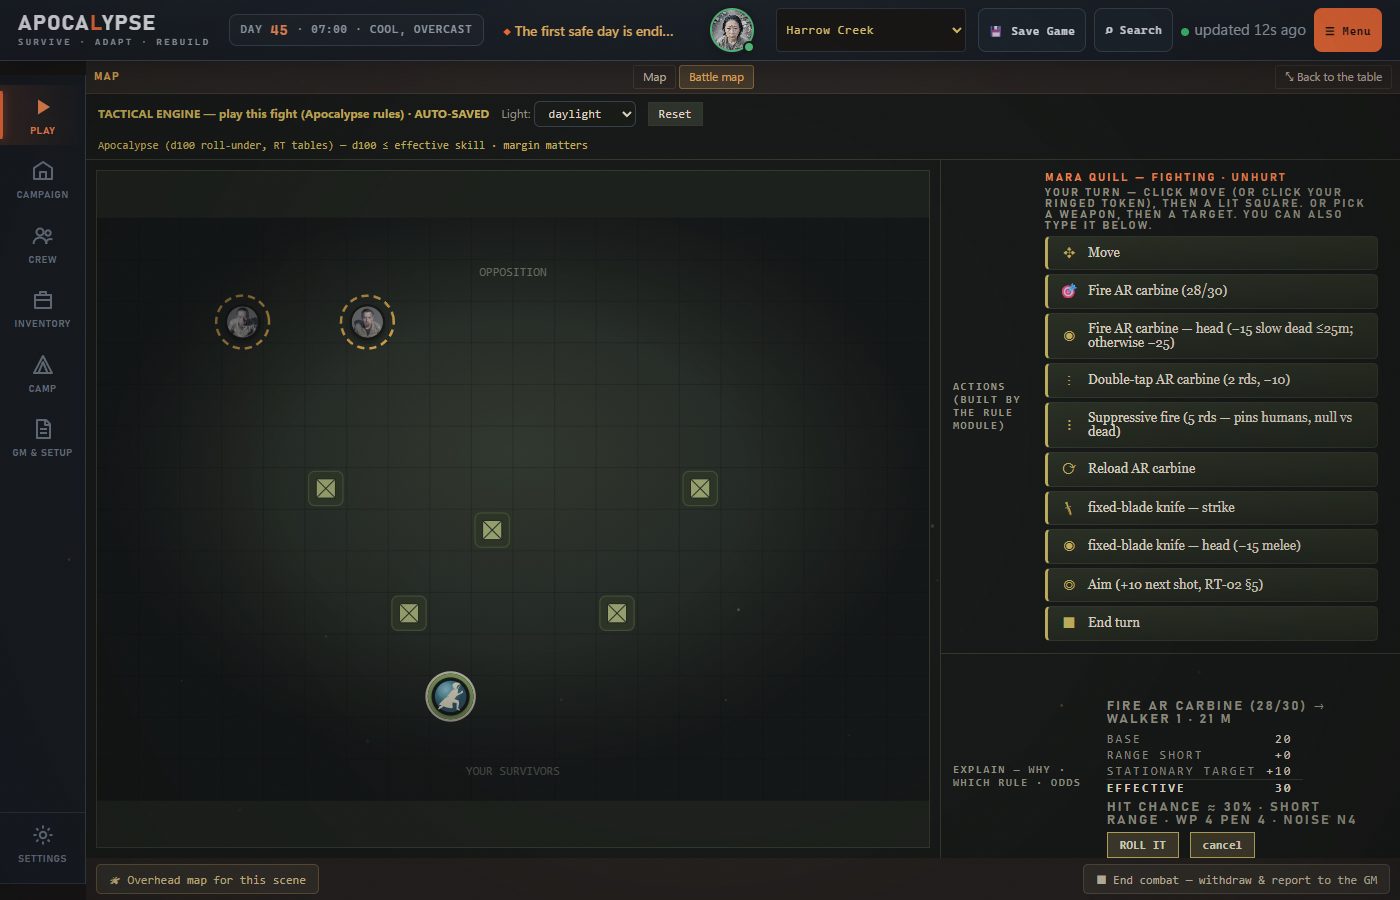
aim for the head, double-tap, reload, the knife, aim, or end the turn.Pick an action, then a target. Only targets you can actually hit are ringed; anything out of sight is
dimmed and says why when you hover it. Before anything is rolled you see the whole calculation — base skill, range,
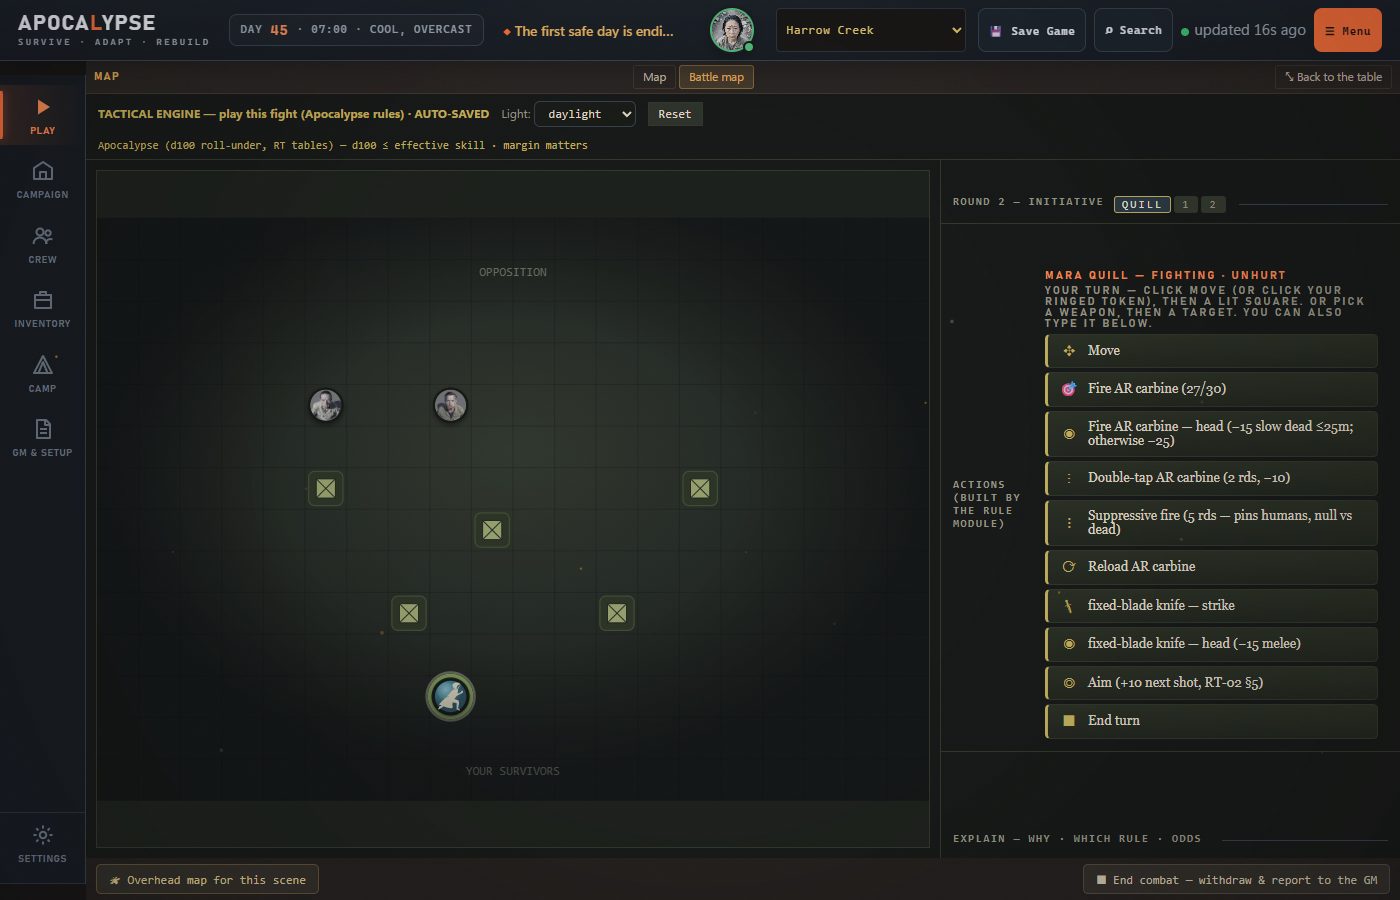
modifiers — and your chance to hit. Press ROLL IT.The result lands in the combat log, then the dead take their turn. Every shot makes noise
(N4 is a gunshot — it carries), and noise draws more of them. What do N4, MoS and RT-09 mean? under
the log explains the shorthand.A few rounds in. Mara is a scout, not a shooter: her rifle skill is 20, so even close up she hits only two or
three times in ten — That is the rules working. A survivor with real points in Long Guns
shoots very differently.
You can leave a fight you're losing: End combat — withdraw & report (bottom right) breaks
off and sends the result back to the story.
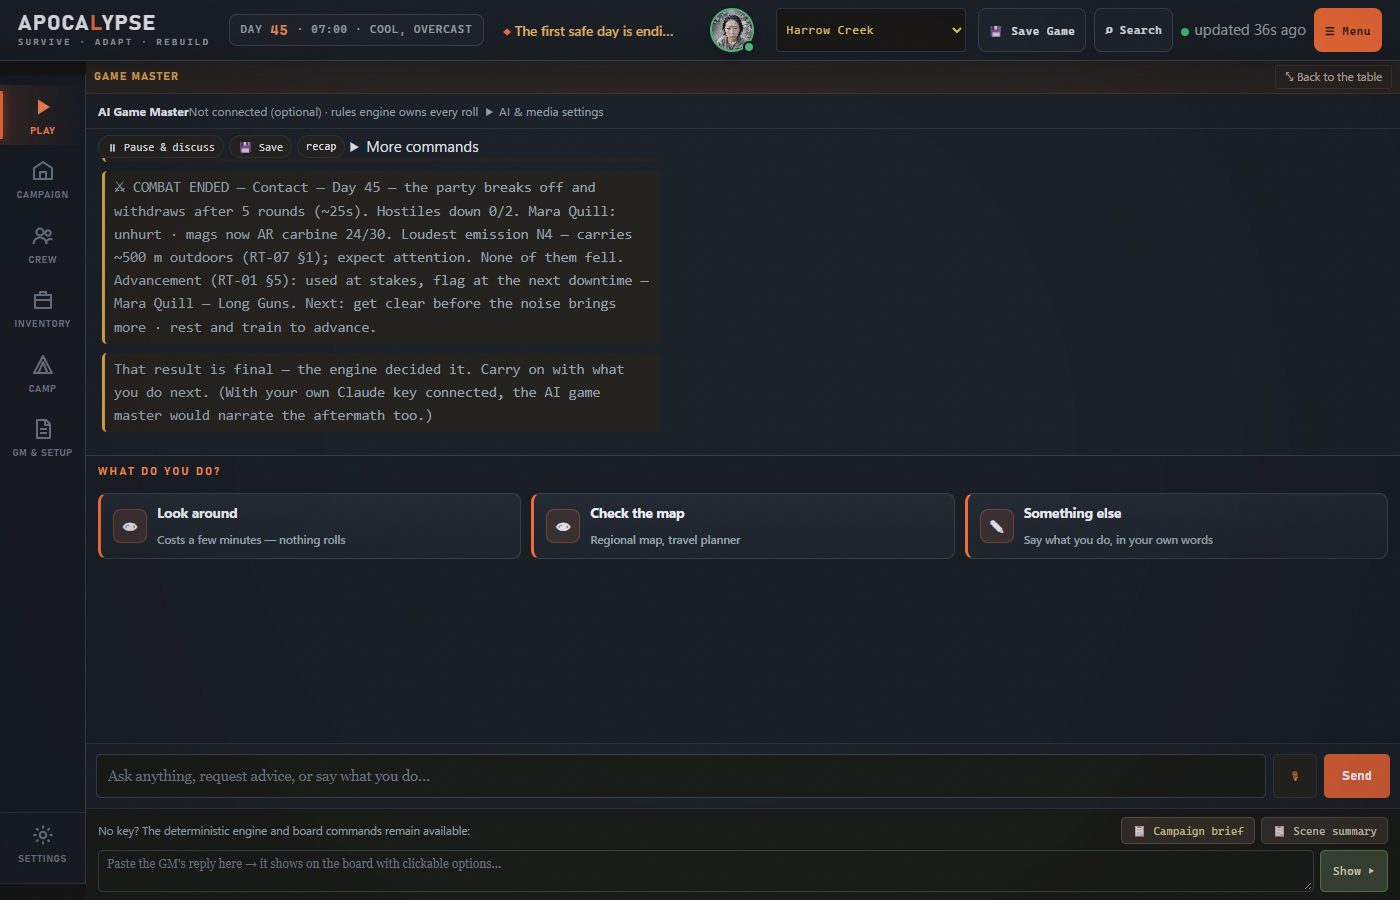
8After the fight
Back in the story, the report: how long it lasted, who went down, how everyone is, ammunition left and how
far the noise carried; who fell and what they left to recover; the skills your survivors used, which can improve at
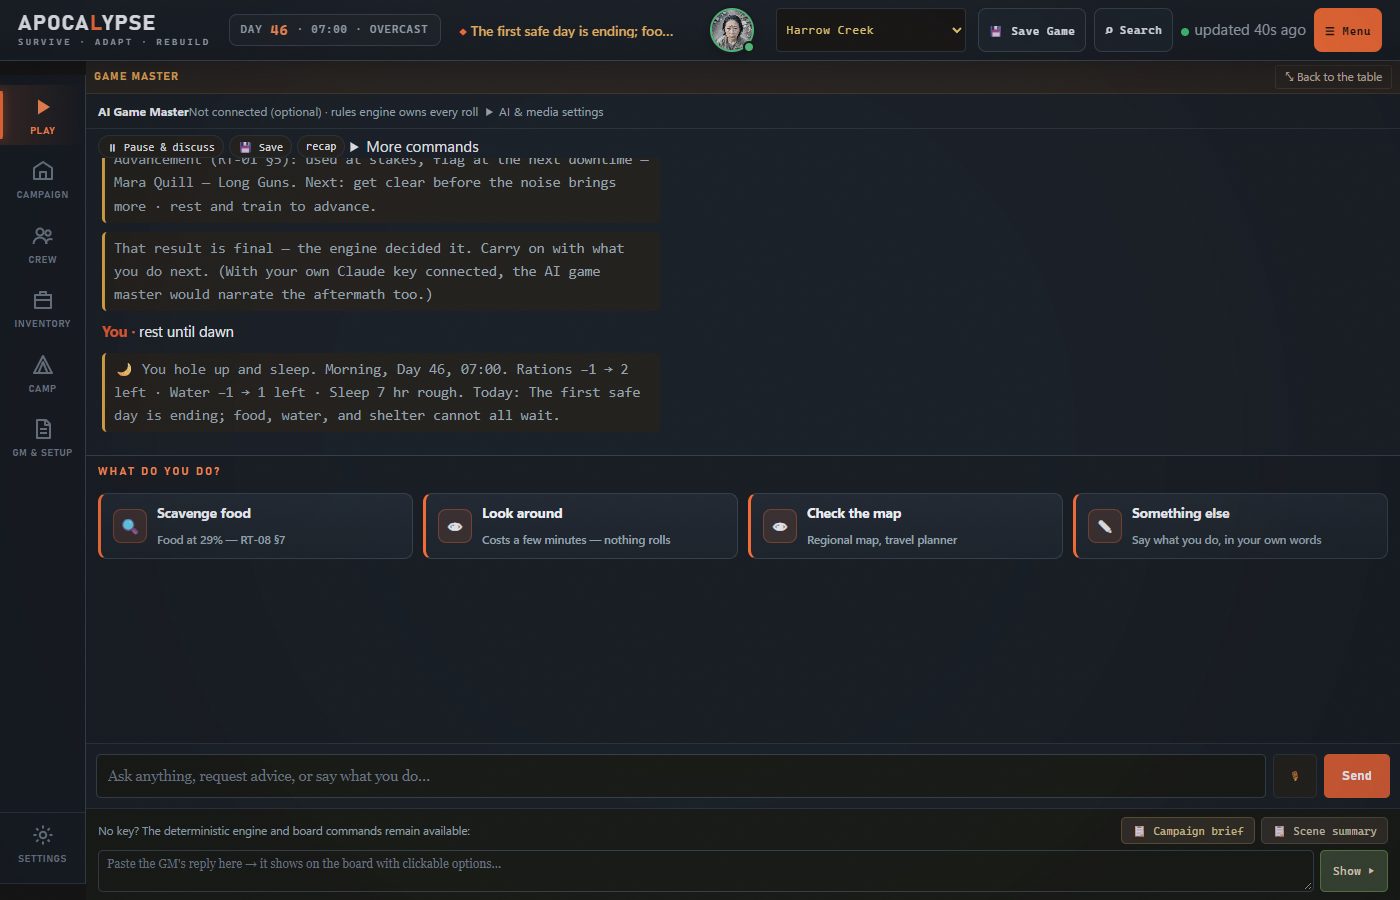
the next rest; and what to do next. It is written into the campaign before the next scene.Rest. Type rest until dawn (or press the card) to sleep until morning: food and water are
used, sleep is counted, and the day's news arrives. Rest and train takes two days and rolls to improve the
skills your survivors used when it mattered.
9Saving and coming back
The game saves as you play. Save Game at the top saves on demand and makes a checkpoint you can go
back to.
Close the tab whenever you like. When you come back and sign in, you go straight back into your campaign,
where you left it.
Your campaign follows your account, so it's the same on another computer.
More than one campaign? The name at the top is a menu — switch between them there.